The exam in macroscopic anatomy at medical school has a reputation for being one of the worse. This is where you have to learn all the bones, muscles, ligaments, vessels and nerves in the body and at Aarhus University also the anatomy of the organs. But don't worry: we guide you through the most important choices you have to make as a new anatomy student.

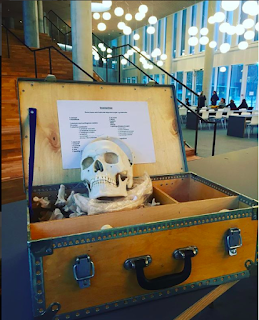
The bone box. You sometimes forget that most people
not used to seeing a femur sticking out of a bicycle basket.
It makes for many funny moments. (Photo credit: Tore Magnussen)
The bone box At the University of Copenhagen, you are given a bone box on the first day of anatomy lessons. It is a large and heavy box with half a plastic skeleton, which you only say goodbye to once the exam is over. The skeleton is clever because you can get a feel for many bone structures, but there is no list of facts included, so you can quickly get confused about which inscisura, fossa, linea or tuberculum on the bone it is, exactly, the book says.
In addition, the plastic bones take up and weigh a lot (and much more than real bones, which are actually lightweight structures - amazing!), and there is already a lot to lug around.
Examination at the University of Copenhagen The examination in the head, neck, musculoskeletal system and the peripheral nervous system is a hard (high) examination, which at the University of Copenhagen consists of two parts: a spot examination and an oral examination (if you know how it is done in other programmes, write finally a comment!).

It can, for example, be one of the many
small ligaments in the ankle, you have to name them.
The mock exam takes place in the university's basement, where you enter the 'dissection hall', where 16 preparations are arranged, i.e. real human body parts. On these preparations, structures are marked which must be named. You have gloves, paper and pencil and tweezers with you, so that you can better grasp the small structures and look at them more closely. You note the name of the structure on your paper, and after approx. two minutes later, a beep sounds in the room, and the entire line of students moves neatly on to the next station with the next preparation. After about half an hour, you are finished, the answers are handed in, and you are ushered out of the room and kept 'locked up' without a mobile phone or computer until the whole semester has gone through. All the correct answers hang out in the hallway - in the style of American films.
The oral exam is classical in its structure, but not in its content. You draw a topic, after which the examiner finds some suitable preparations (again: body parts) to demonstrate your knowledge from. For my exam, I pulled a muscle group in the thigh and some nerves on the neck - and then you can almost calculate the preparations yourself. It might sound crazy, but looking at real people is a great way to learn anatomy, and I think it makes better doctors because we also learn how different people can look. Deep gratitude to the donors from here anyway!
Guide to equipment
Now to the specifics. At the start of the semester, you are bombarded with good advice from all sides. Here are some of the most important acquisitions that you can consider.
Books : First you have to get the books, which are not exactly cheap, but nevertheless indispensable. Next, you have to choose between all the other options.
Atlas : I almost didn't use my atlas - it was far too complex, detailed and heavy to carry around. An atlas is also expensive, but many people buy one anyway because it decorates the bookshelf at home.
Reading partner : Towards the exam, my reading partner and I spent hours listening to each other in first the basics and then the advanced. Here, however, we also often lacked an opportunity to have ALL the most important things together without so many disturbing elements - you drown in details very easily.

Section of the poster - see the full version further down.
Poster : It is possible to buy a study poster, which gives a visual overview, which can otherwise be difficult to obtain. eAnatomi has developed a real 'study poster' from scratch. It contains all bone projections, ligaments, joints and muscle groups divided according to the same system as the Danish literature. The poster is unlike others on the market in Danish-Latin, which makes it easy to go to (the others are in German or Anglo-Latin).
You can hang it above the desk at home, or fold it up and take it to uni. Good for forming an overview from and for getting a handle on the details later.
Overview : It can be easy to be overwhelmed by information in class. For example, it is confusing that there are many different ways of categorizing the muscles in the Danish literature in relation to one's atlas and the apps that are available (atlases and apps are usually in Anglo-Latin).
The best thing to do is to keep calm and start from scratch. What are the main projections on a bone called? Which muscles are found in which groups? It must be learned by heart from the start - otherwise it is difficult to progress. Then you can always wait with the details about the origin and insertion of the muscles.
The Golden Notes : If you haven't already found the 'Compendium of Anatomy' by Ali, Robin and David, hurry up and get it and print it.
Get your hands on the poster here 
Among other things. The poster has been reviewed and recommended by Professor Jørgen Olsen, who is the course leader at the University of Copenhagen for the course in head, neck, musculoskeletal system and the peripheral nervous system.